

Preparing Your Home for Professional Property Photos: The Ultimate UK Seller's Guide in 2025
- naomichance
- Mar 6, 2025
- 3 min read
Updated: Mar 24, 2025
Let's face it – today's property sales happen online first! A staggering 98% of UK property searches begin on the internet, according to Rightmove's Digital Marketing Report.[1]
Even more eye-opening? Properties with professional photography sell 32% faster and achieve 7-9% higher sale prices, based on Zoopla's analysis of UK property listings.[2]
That first impression is make-or-break. Let's make sure your property absolutely shines through the camera lens!
Pre-Photography Staging: Setting the Scene
The Before-Camera Preparation
The Home Staging Association UK found that 83% of estate agents say well-prepared properties photograph dramatically better, directly impacting buyer interest.[3]
Essential preparation checklist:
Deep clean all visible surfaces
Remove 80% of personal items
Clear all countertops completely
Ensure consistent lighting throughout
Address exterior presentation
"The camera amplifies both positive and negative aspects of your property," explains professional property photographer Sarah Hunt. "What seems minor to the naked eye can become a major distraction in photos."[4]
Lighting Optimisation: The Photographer's Secret Weapon
Illumination Excellence
The British Institute of Professional Photography reports that lighting is the single most important factor in property photography quality.[5]
Lighting preparation strategies:
Schedule shoots for optimal natural light (morning for east-facing rooms, afternoon for west-facing)
Replace all burnt-out bulbs
Use consistent colour temperature bulbs (2700K-3000K)
Remove heavy window treatments
Clean all windows thoroughly (increases light by up to 30%)
Turn on ALL lights before the photographer arrives
Professional tip: Increase bulb wattage temporarily for the photoshoot – you can always revert afterwards.
Furniture and Accessory Placement: Composition Matters
Strategic Arrangement
Interior design specialists at John Lewis note that furniture placement for photography differs from everyday living arrangements.[6]
Photo-specific staging techniques:
Create greater space between furniture pieces
Position furniture to highlight room features
Remove pieces that block architectural elements
Arrange decorative items in odd numbers (the rule of three)
Use fresh flowers or plants for pops of colour and life
Position bed pillows vertically for fuller appearance
Room-Specific Preparation: Space by Space Excellence
Kitchen Presentation
According to Rightmove's buyer behaviour analysis, kitchens are the most scrutinised room in property photos.[7]
Kitchen photo preparation:
Clear countertops completely
Remove all magnets/papers from refrigerator
Hide dish soap, sponges, and cleaning supplies
Replace tea towels with fresh ones
Store small appliances out of sight
Add one statement piece (fruit bowl, flowers)

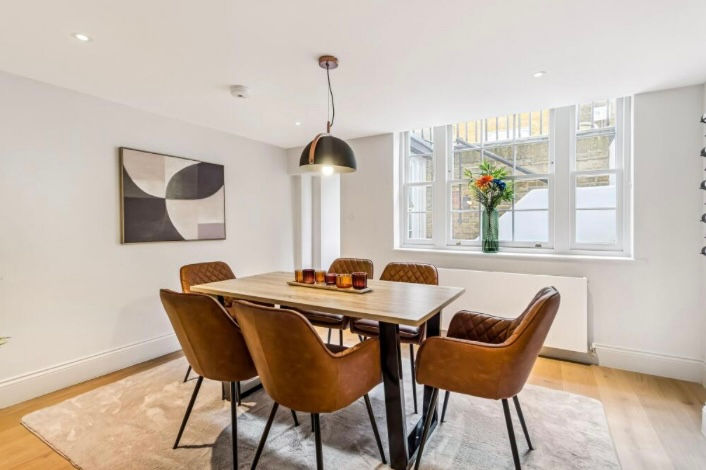
Living Room Styling
The Property Academy found that living room photos influence 83% of buyer's decision to view a property.[8]
Living room photo preparation:
Remove remote controls, magazines, and everyday items
Style coffee table with maximum three decorative objects
Position cushions upright and plumped
Hide cables and electronics
Ensure artwork is straight
Pull furniture slightly away from walls
Bathroom Optimisation
Savills property research shows that bathrooms can be dealbreakers in property marketing.[9]
Bathroom photo preparation:
Remove ALL personal toiletries
Close toilet lids
Hang fresh, matching towels
Clear shower screens of any water marks
Remove bath mats
Add single decorative element (candle, plant)

Technical Preparation: Working with Your Photographer
Professional Collaboration
The Guild of Photographers provides these recommendations for homeowner-photographer cooperation:[10]
Photographer partnership tips:
Confirm exact arrival time (plan to be absent if possible)
Discuss key property features to highlight
Prepare list of best times for specific rooms
Ensure all lights are functioning
Secure pets away from shooting areas
Move vehicles from driveway/front of property
Provide access to all rooms to be photographed
Digital Enhancement Considerations: Beyond the Shoot
Post-Production Options
BoxBrownie's property marketing analysis shows that 86% of professional property photos receive some enhancement.[11]
Digital enhancement options:
Sky replacement (significantly impacts exterior shots)
Item removal (minor distractions)
Colour correction
Virtual twilight (dramatic evening appearance)
Virtual furniture for empty properties
Perspective correction
Average cost: £10-30 per enhanced image
Post-Photography Maintenance: Keeping the Look
Consistency Matters
The Home Staging Association UK emphasises that properties should match their photos during in-person viewings.[12]
Post-photo maintenance:
Create photo reference guide for each room
Develop quick pre-viewing checklist
Maintain cleanliness standards
Keep staged elements in place
Restore photography setup before viewings
Conclusion
Professional photography isn't just a marketing expense—it's a critical investment in your property's sale potential. By preparing meticulously for your photo session, you're setting the stage for a faster sale at a better price.
Remember: In today's digital-first property market, your online listing is your property's first showing. Make it count!
References
[2] Zoopla, "UK Property Listing Analysis" (2023)
[7] Rightmove, "Buyer Behaviour Analysis" (2023)
[11] BoxBrownie, "Digital Enhancement Statistics" (2023)
Article publish date: 06/03/2025
Article review date: 06/09/2025


Comments